Gem moves the big renovation on to the biggest ‘room’ of all – the outdoor area.
It’s been fair few months since we moved from ‘the big smoke’ with grand plans of living the quarter-acre dream. And, although ours is definitely more of a sixth-of-an-acre dream, we’re not complaining. Now, with the faux brick a distant memory and a fresh coat of Resene Foundry on the walls, it’s time to tackle the strange little corner at the back of the property. Square metres of potholes and grass face us: what to do, what to do? With a small plot of land and only small change to work with, there come a few obstacles. How can we make the most of every square inch, and do it practically, affordably and stylishly? Listen closely little grasshopper, I will show you how…
Create your space
Find out exactly what you’re working with – what is the area used for? What sunlight does it get? What cons can be turned into pros? For us we had an odd-shaped area, with a heap of delicious morning sun, that was mostly a thoroughfare for the clothesline and other utilities. With a corrugated iron fence thrown in, what we were looking at was not pretty.

Draw it out
Getting aerial can give you just the perspective you need. Looking at our space from above we started to see what it could be, rather than what it was. The shape of the fence lent itself perfectly to a built-in corner seat. The high fence created an intimate and cosy space. And the need for hard-wearing materials prompted us towards something other than the usual paving extravaganza.
Choosing materials
First off, practicality. The main traffic heads out to the clothesline and around the corner to the utilities. As I’m not the biggest fan of pavers, we chose to mix and pour a concrete path ourselves, echoing the lines of the house and creating a concentrated area. And yes, I was in there, trowel and all. With the built-in seat we decided to use a base of marine ply and fence paling with a liftable lid for extra storage. Keeping true to the area, we filled in the space with Hawke’s Bay river stones. And let’s not forget the fire pit foraged from an old washing machine!

The details
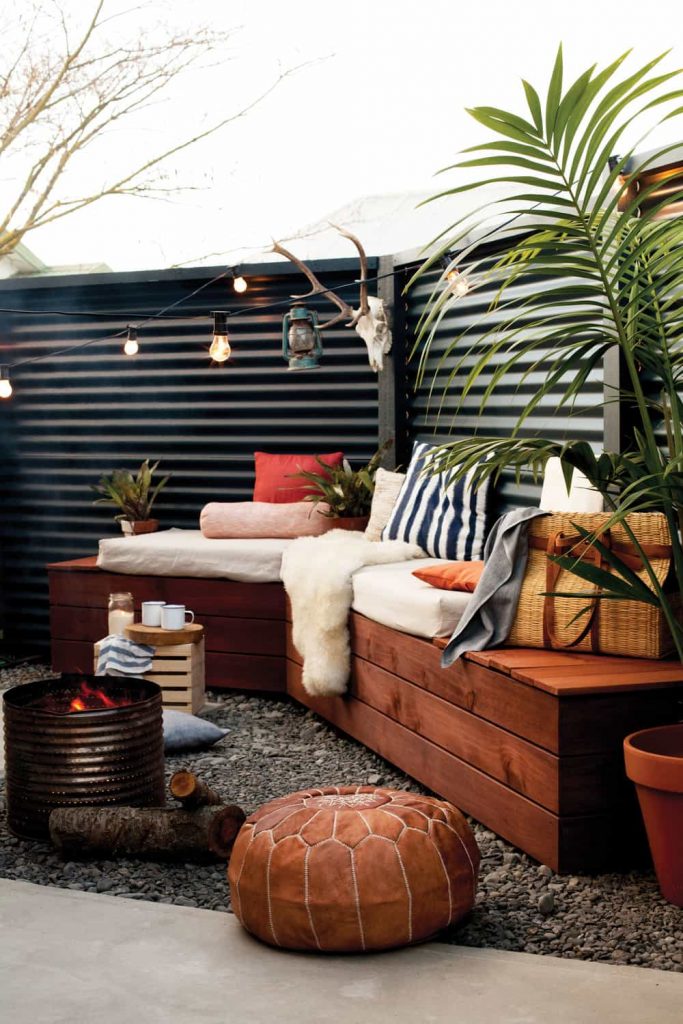
Always begin with a colour direction – I channelled deep blues and burnt oranges. For the deep moody blue on the fence I chose Resene Blue Bark. Then, to add warmth to the pine seating, we stained it with a Resene Cedar oil stain. With the built-in nook the requirement was that it be warm and inviting, great for balmy summer sunsets, as well as snuggling up on crisp winter nights. Heading straight to The Fabric Store for material, my handy mama and I whipped up oatmeal linen squab covers and simple pocket cushion covers in a spread of burnt red and navy blues.
The finishing touches
Lighting is key, and in this instance there was no option other than to hang festoon lights, along with a few candles. I am a complete sucker for greenery, so we dotted the area with a few terracotta pots housing a palm and some bromeliads. An upside-down crate became our outdoor coffee table, with a Moroccan pouf for extra seating and a fluffy sheepskin for added comfort. We finished the whole thing off with Fred-the-ram, sourced from a local auction house, and ram-bam: we have ourselves a great little outdoor space.
Follow Gem’s renovation at theblackbird.co.nz
Words & photography Gem Adams